In today’s time, technology has become a vital part of everyone’s life. Whether it’s a personal task or office work, technology plays an important role. Various technology-enabled solutions are available for fulfilling different purposes.
Therefore, technological tools, devices, software, and applications have become essential when it comes to communication amongst the executives or professionals working together. One such application or platform is Microsoft Teams. Microsoft Teams might not be an unfamiliar term for you if you work in the corporate world. In fact, it’s quite possible that you might be using this application on a regular basis.
However, despite using a certain tool, software, or platform, users might not know each and everything about it. These tools and platforms have a ton of features that make them an ideal or perfect solution in a variety of scenarios. Whenever users face any doubt, they try to resolve it by learning from others or conducting a search on the Internet.
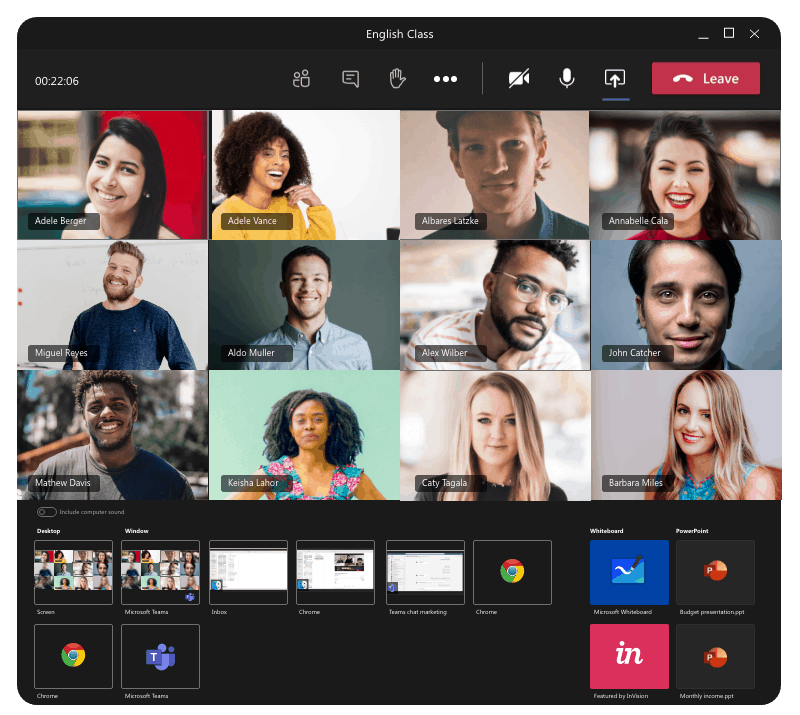
This blog post on how to share screen on Teams is an effort to resolve the doubts and queries of users who encounter problems sharing their screens on Microsoft Teams due to a lack of knowledge. Just like Zoom and other platforms, Microsoft Teams also offer the feature of screen sharing. We have mentioned all the steps in a simple and clear manner.
Table of Contents
Microsoft Teams: Learn About Its Different Features
Microsoft Teams is a proprietary business communication platform from Microsoft. It is a part of the Microsoft 365 family of products. Microsoft Teams is primarily a real-time collaboration and communication application. It allows the users to communicate effectively whether they are working in a workplace or remotely. Users can send and receive messages. They can make and attend video calls.
Along with chatting and video conferencing, Microsoft Teams offers many other features as well. Some of these features are sharing documents, task planning, and searching the required documents. Users can even hold and attend online meetings. Microsoft Teams helps organizations to manage teams and work seamlessly on different projects. This tool has many other benefits as well.
Learning how to share screen on Teams will help you to make the most of the platform. The best part about Microsoft Teams is that it integrates with other platforms, such as Microsoft Outlook, OneNote, and OneDrive. It offers a chat, voice, and video interface to users. At times, it becomes important for the users to share their screens with others. We have laid out simple steps that can help you do this.
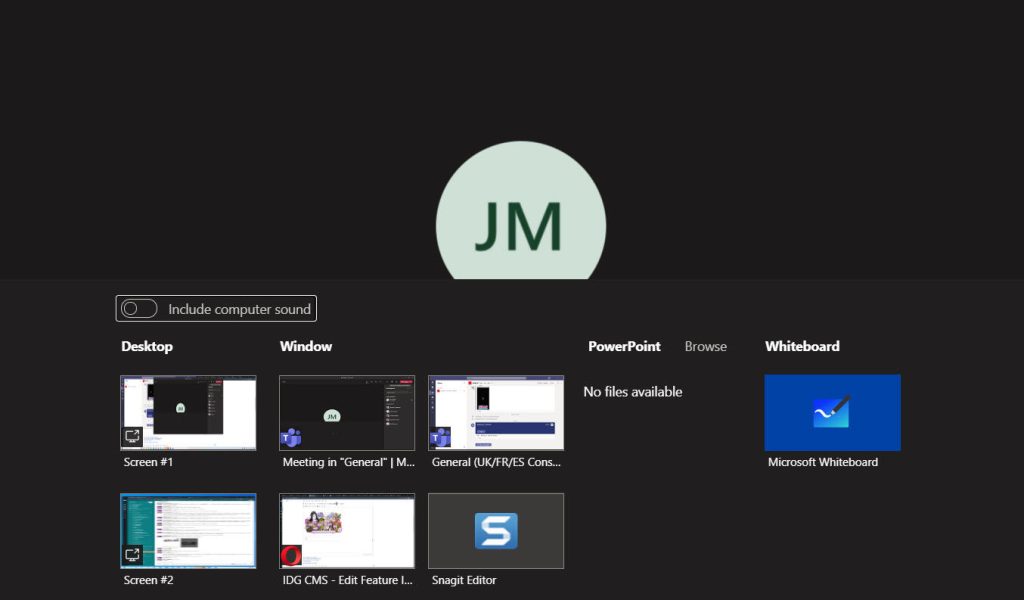
But before that, you must know that Microsoft Teams provides users with different options for screen sharing. Users can share their entire screen, a particular window, a PowerPoint presentation, or a Microsoft-provided whiteboard.
Share Screen on Microsoft Teams During a Meeting
The steps described here will help you understand how to share screen on Teams during an online meeting.
1. First of all, click on the ‘Share Content’ button located next to the ‘Leave’ button in the upper right corner of the screen.
2. Here, you need to choose whether you want to share your computer audio.
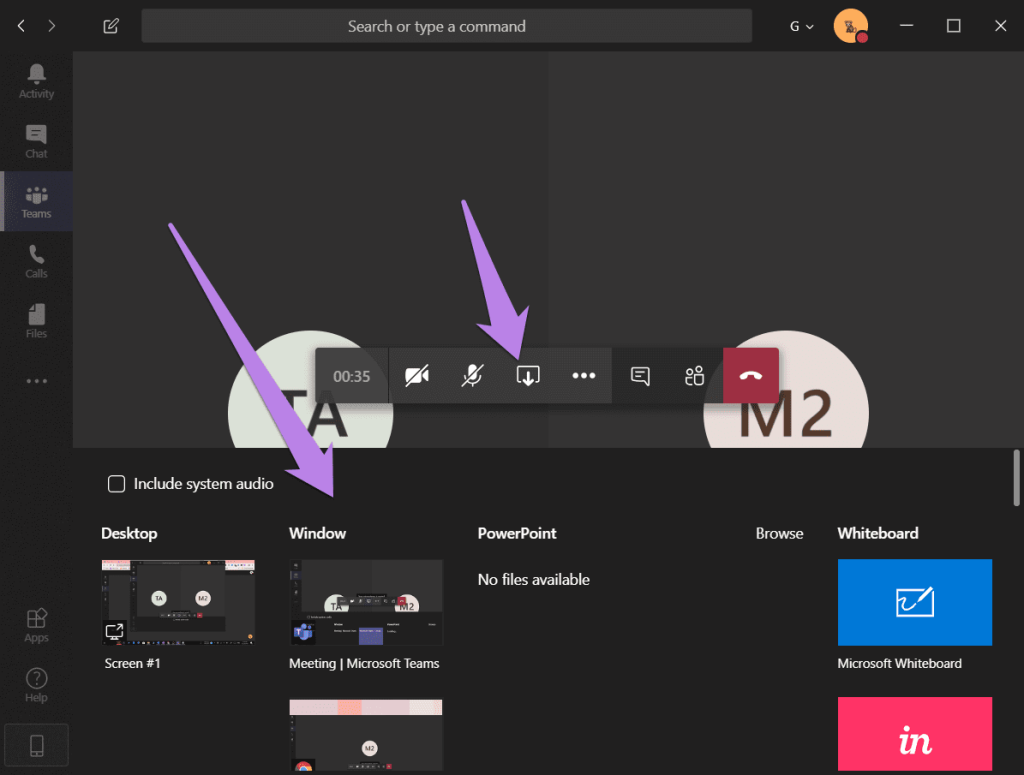
3. You will see a menu in the lower portion of your screen.
4. You need to select one button from the various buttons available there in the menu.
These buttons represent different options available to the users to share their screens. Learning how to share screen on Teams is incomplete without learning about these options.
5. The ‘Screen’ button will allow you to share everything on your screen (desktop) with others.
6. The ‘Window’ button will allow you to share a specific window that is currently open on your computer.
7. The ‘PowerPoint Live’ button will allow you to show a PowerPoint presentation created by you.
8. The ‘Microsoft Whiteboard’ will allow you to share a whiteboard where users can sketch together.
Once you have started sharing screen by selecting an option, a sharing toolbar will appear on the top of the meeting window. You might notice a red border surrounding what you share, depending on the device you are using.
You can also give the control of your screen to others with whom you are sharing your screen.
1. You just need to click on the ‘Give Control’ button.
2. You can click on the ‘Stop Sharing’ button whenever you want to stop sharing your screen.
Share Screen on Microsoft Teams in a Chat
Let’s have a look at how to share screen on Teams while you are chatting with others. You can share your screen in a one-on-one chat and a group chat in Microsoft Teams.
1. Just go to the chat controls in the upper right corner of the chat window.
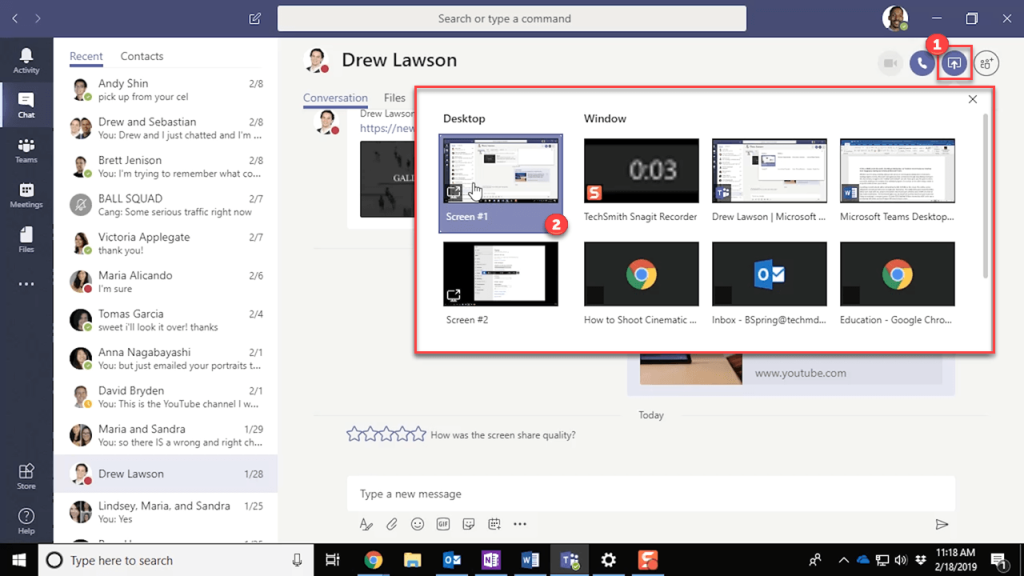
2. Now, select ‘Share’ to start sharing your screen with other users.
3. Select the ‘Desktop’ option to share everything on your screen.
4. Select the’ Window’ option if you want to share any specific window. The user with whom you intend to share your screen will receive a notification asking them to accept the invitation to see your screen.
Along with learning how to share screen on Teams, it’s also important to learn how to stop sharing your screen in a chat on Microsoft Teams.
5. Go to the meeting controls and select the option ‘Stop Sharing’.
The screen sharing feature in Microsoft Teams is useful in many ways. Many times, people want to show something to other users in a chat or during an online meeting. The screen sharing feature enables users to achieve this objective. You can discuss a PowerPoint presentation, a document, or anything else.
Final Thoughts
We hope that now you must have understood how to share screen on Teams. You can use the screen sharing feature to perform various tasks, such as explaining important facts, showing numerical data, etc.
RELATED ARTICLES
Latest Articles
 How Long To Soak Chia Seeds: A Simple GuideIn TipsFebruary 11, 2025Chia seeds are little round black seeds that have […]
 How to Spot Fake Software Licenses and Avoid ScamsIn TechnologyFebruary 4, 2025Image Credit: pexels.com In today’s complex […]
 What Factors Should Businesses Consider When Choosing A SIP Trunk Provider?In TechnologyFebruary 1, 2025Under the conditions that are related to running a […]
 Best ATV Rentals in Dubai for Unforgettable Desert SafarisIn TravelJanuary 29, 2025Image Credit: pexels.com Dubai is a city that offers […]
 The Evolution of Paint Protection Film: Innovations You Need to KnowIn TechnologyJanuary 26, 2025Over the years, Paint Protection Film (PPF) has […]
 Your Ultimate Guide to Local SEOIn MarketingJanuary 17, 2025Local SEO can be defined as optimization of the online […]
 Top 5 Reasons Why the Organic Traffic Is Really Beneficial for BusinessesIn MarketingJanuary 16, 2025Many companies invest heavily in SEO, with the […]
 Understanding the Power of Spreadsheet Software for Personal and Business UseIn TechnologyDecember 7, 2024In today’s data-driven world, spreadsheet […]
 The Summer Learning Loss – 7 Key Aspects You Must Understand in 2025In TipsNovember 29, 2024Every year, students face summer learning loss during […]
 Equity Trading in Global Markets: Key ConsiderationsIn TipsNovember 4, 2024How prepared are you to explore the possibilities that […]
 Crafting a Standout Resume and Networking Your Way to Jobs in CanadaIn TipsOctober 23, 2024When applying for jobs in Canada, the format of your […]
 How to invest in the future?In TechnologySeptember 27, 2024Who doesn’t want to build up some extra pension […]
stopie.com is a participant in the Amazon Services LLC Associates Program, an affiliate advertising program designed to provide a means for sites to earn advertising fees by advertising and linking to Amazon.com.
Clicking on an Amazon link from stopie.com does not increase the cost of any item you purchase.
We will only ever link to Amazon products that we think our visitors may be interested in and appreciate learning more about.

